|
|
|
|
|
Neutral Density Filter |
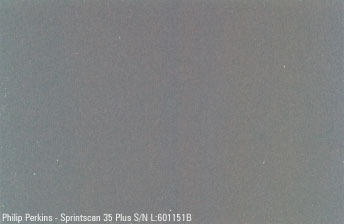
Film Strip - Scanner 1 |
Film Strip - Scanner 2 |
|
|
|
|
|
Neutral Density Filter |
Film Strip - Scanner 1 |
Film Strip - Scanner 2 |
|
Neutral Density Filter
|
Film Strip - Scanner 1
|
Film Strip - Scanner 2
|
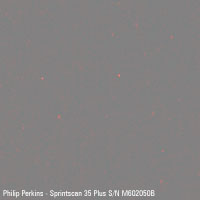
Notes:
The initial purpose of this test was to investigate the scanner 'noise' that I
had previously reported in my PhotoCD v Sprintscan
comparison. At Chuck's suggestion I decided to compare a neutral density filter
against an unhypered unexposed film strip of similar density. In both cases the
scanner contrast was set to maximum of 3.0, the brightness to 0, and the exposure
was adjusted for mid-grey (127/128) levels in all three channels. The scans were
done in colour for consistency, since the 'noise' problem had been observed in
colour mode. The result speaks for itself - Chuck was right - the scanner is not
responsible for the image 'noise' that I see. Instead it is caused by film 'graininess'.
What confused me is the almost total absence of this 'noise' in the PhotoCD scan
(above link). It now seems clear that some part of the PhotoCD process removes
film graininess without a significant impact on image sharpness.
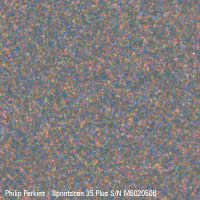
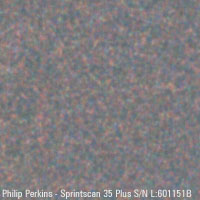
Subsequently I scanned this negative again for the Scanner 2 test and the result was greatly surprising. The image appeared much more fuzzy than the Scanner 1 image. It seemed that there was a focus problem with the scanner. I repeated the scan several times and tried different negatives but the results were the same. The lack of sharpness can also be seen upon close inspection of Chuck's M8 negative. This indicates either that the scanner focussing was defective or that the scanner software had been updated with a process to reduce film graininess (same thing as done by PhotoCD). It is interesting that when this scanner came back from repair the firmware had been upgraded from 5.90 to 5.94. It seems possible that the firmware upgrade includes some sort of process to reduce graininess which thus makes the image appear slightly less sharp. I shall enquire with Polaroid as to whether this is the case.
Why did the relative lack of sharpness not impact the resolution test? I think the answer is that the resolution was affected to a small degree, however sharpness and resolution are not exactly the same thing. By increasing the contrast and lowering the exposure of the test target I believe I was able to compensate almost completely for the lack of sharpness. The use of sharpening in the scanner software probably helped also.
As a result of this experience it seems that this test is also very good for revealing differences in scanner sharpness, hence this test was renamed to a 'Noise and Sharpness Test'.
|
|
|
|
Scanner 1 |
Scanner 2 |
|
Scanner 1
|
Scanner 2
|
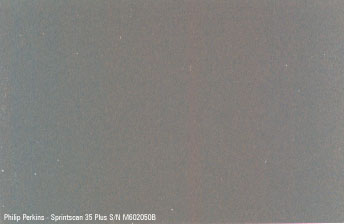
Notes:
The purpose of this test is to show inherent scanner artefacts. Such artefacts
become an inseparable part of the image in all scans. With regular daylight material
these artefacts should never normally become visible, however they have potential
to become visible when stretching contrast and doing other enhancement work to
thin astro negatives. The more that an image needs to be enhanced, the more that
scanner artefacts become visible. Hence, this is a very important test for a scanner
that is to be used for astro work.
Notice the significant differences between the two images. The left hand image has a strong brown vertical stripe near the centre. This is sufficiently strong that it will spoil many scans of thin astronomical negatives, especially ones that have a flat background and need a lot of enhancement. The brown stripe can even be seen very faintly in the Noritsu test negative which had virtually no enhancement. The right hand image is much better. Although the image fades to blue towards the left edge this has never yet shown up in any enhanced images.
Summary:
Neither of the above tests were part of the APML test, yet they showed more
differences between the scanners than any of the APML tests. These tests are
also exceptionally easy to perform - simply take an unexposed colour film strip
and scan it with the contrast set to maximum, the brightness set to 0, and adjust
the exposure until all three channels are approximately 127/128 - i.e. mid grey.
The same settings are used for both tests except that for the noise test a cropped
portion is scanned at 2700 dpi and for the artefacts test the whole frame is
scanned at 253 dpi. It is important that these tests are done in colour mode
since noise and scanner artefacts often become most evident as differences between
the three colour channels.
Sometimes the simplest test is the most revealing. A classic example is the star test on a telescope.
|
|
|
|